How to Make Your Own Buttons: From Print Sheet to Finished Pin
Make your own pin-back buttons in five steps: choose a size, design online, download the print sheet as a PDF, print at actual size, then punch and press.
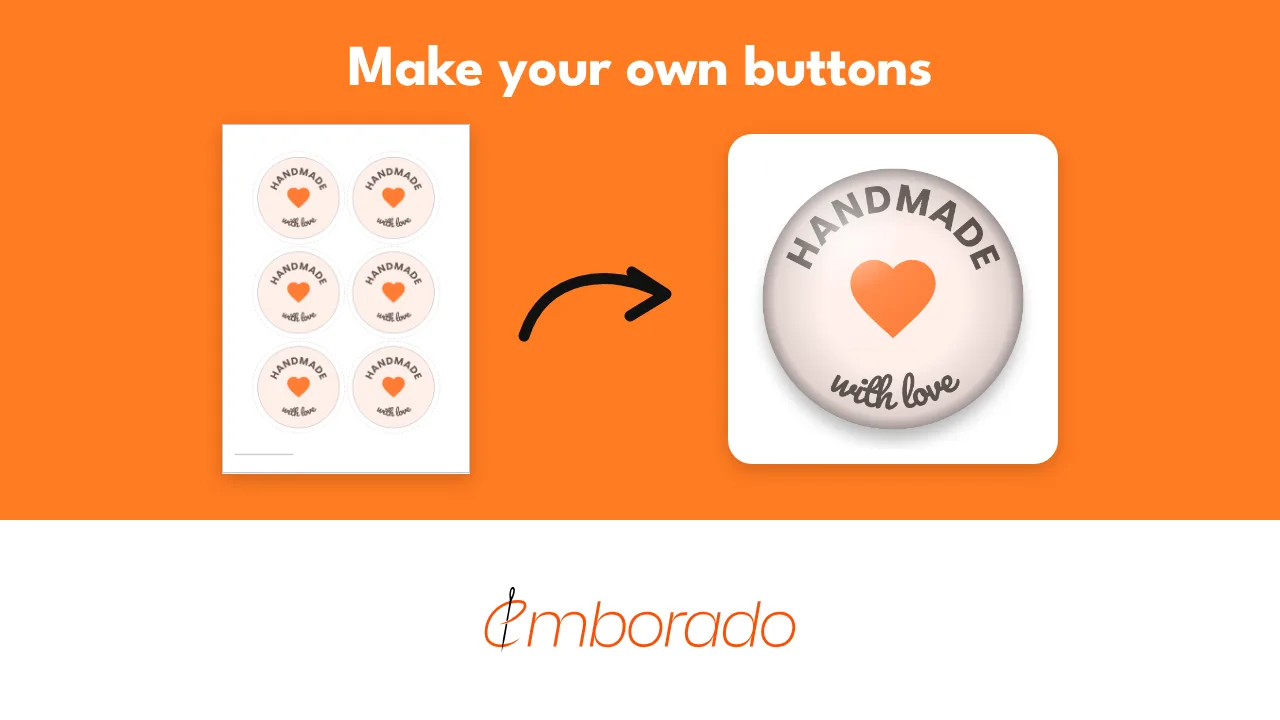
A button for your stall at the craft market, for the guests at a birthday party, or as a small extra in every parcel: pin-back buttons are quick to make once the print template is right. That is where things usually go wrong. The design sits off-centre, the lettering disappears over the rim, or the printout is a few percent too small.
This guide walks you through making your own buttons, also known as button badges, from choosing a size to pressing. For the template we use the free button maker by emborado. You design in the browser and get an A4 print sheet as a PDF in true size.
Contents
- What you need to make buttons
- Choosing the right size
- Face, motif area and cut edge
- Designing buttons online
- Downloading the print sheet as a PDF
- Printing at actual size
- Punching and pressing
- Common mistakes and how to avoid them
- Frequently asked questions
What you need to make buttons
A button has four parts: a metal shell, the printed paper, a clear protective film and a back with a pin. The button machine presses them together and wraps paper and film around the rim of the shell.
You will need:
- a button machine (often called a badge maker) in the size you want,
- matching blanks, meaning shells, films and backs made for that machine,
- a punch or circle cutter for cutting the paper,
- a printer and ordinary printer paper,
- a print template that places your designs at the right size.
Machine, blanks and punch belong together. Blanks from another manufacturer do not always fit, even when the size has the same name. Very thick paper usually will not wrap cleanly around the rim. Your machine’s manual tells you which paper weight it can handle.
Choosing the right size
The size of a button is the diameter of the face you see from the front. The button maker offers the common round metric sizes. Each link opens it with an empty print sheet in that size:
- Design 25 mm buttons: the classic small size, good for a single symbol or a logo.
- Design 32 mm buttons: a little more room, for a symbol with a short word.
- Design 38 mm buttons: a versatile medium size for a motif and text.
- Design 50 mm buttons: easy to read, also with a name or a short slogan.
- Design 59 mm buttons: enough space for photos and text along the rim.
- Design 75 mm buttons: for anything that should still be readable from a few metres away.
What matters is the machine and the blanks you own. Inch sizes are not the same as metric ones: a 2.25 inch button is not a 59 mm button, so go by what your blanks say. If you have not bought anything yet, think about what should go on the button first. A photo or a slogan needs more room than a symbol.
Face, motif area and cut edge
The paper of a button is larger than the button itself, because it is wrapped around the rim of the shell. A good template therefore shows three circles:
- Face: this is what shows on the finished button from the front.
- Motif area: it lies slightly inside the face. Faces, lettering and anything else important belong in here, because the edge of the button is curved.
- Cut edge: up to here the paper is punched out and wrapped around the rim. A background colour or background image should reach the cut edge, otherwise white paper shows at the rim.
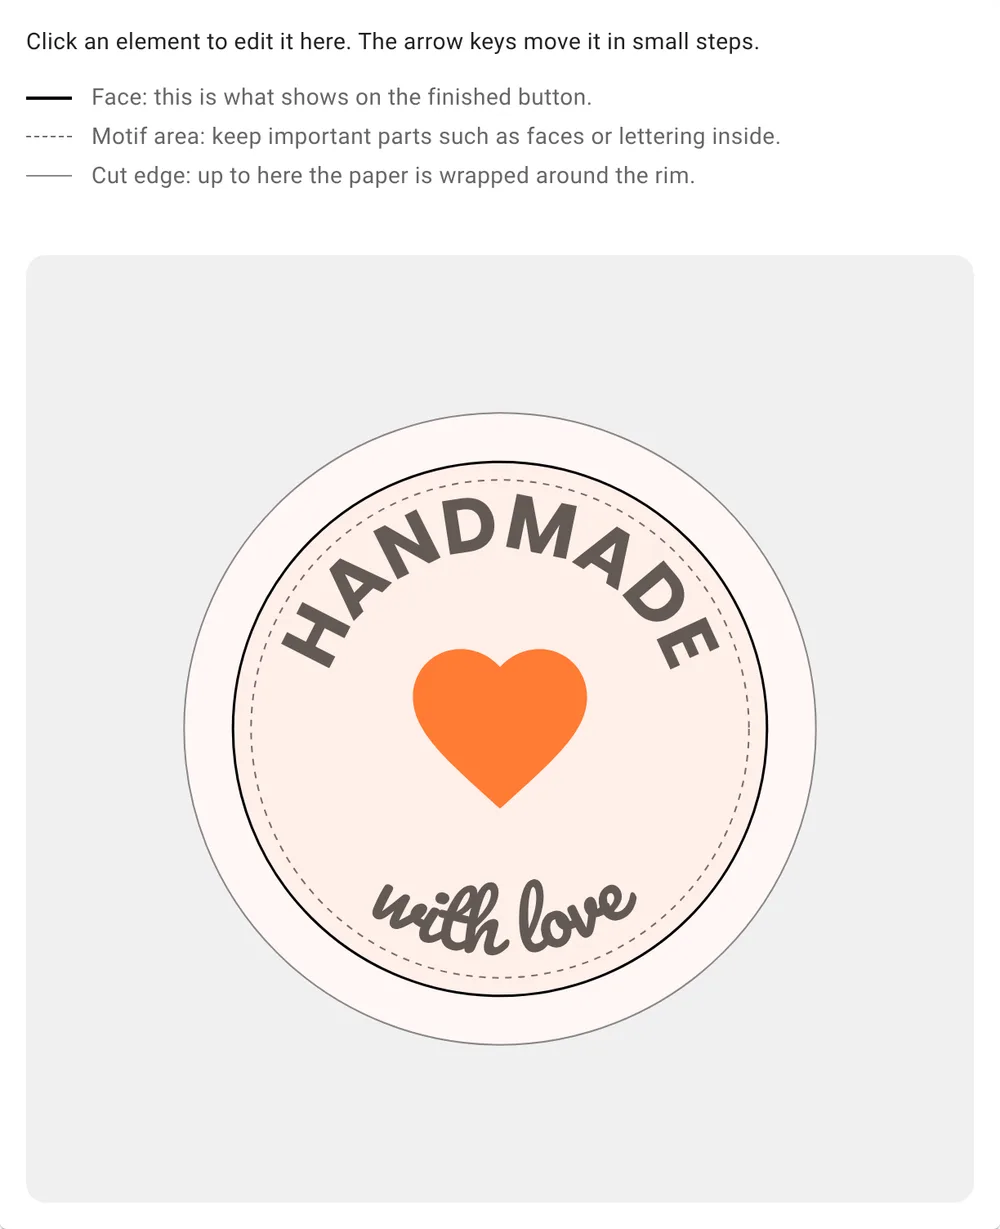
You will find the measurements of the three circles for every size in the table below the button maker. Before your first print, compare the cut edge with the paper cut your machine’s manufacturer specifies.
Designing buttons online
The button maker runs in the browser, and you do not need an account to design. Here is how it works:
- Choose a size. Take the size of your blanks.
- Set the background. Pick a colour, or upload an image and use it as the background.
- Add images. Upload photos and logos as PNG or JPEG. You can move, rotate, scale and crop them. If an image is too coarse for the chosen size, the button maker tells you.
- Add text. There are eight typefaces to choose from, from plain to playful. With the arc setting the text runs in a curve, and with one click it follows the rim at the top or bottom.
- Add shapes. Insert a heart, a star, a paw or one of more than 50 other shapes with a click and recolour it.
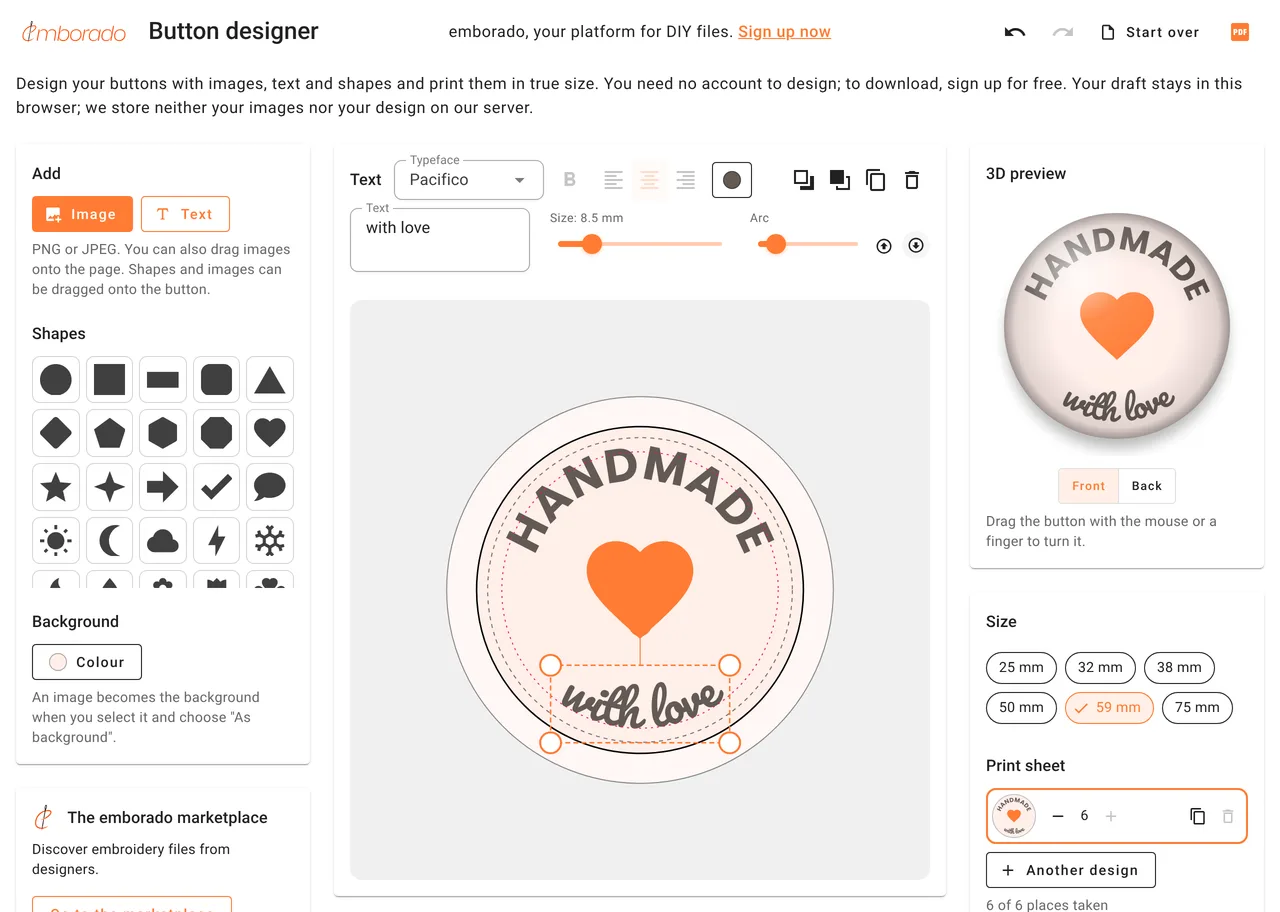
The 3D preview shows what the curved button will look like, so you can quickly see whether lettering sits too close to the rim. Your draft stays in your browser, so you can continue later on the same device.
Downloading the print sheet as a PDF
An A4 print sheet holds several buttons. You can create different designs and set how often each one goes on the sheet. The button maker shows how many places each size has.
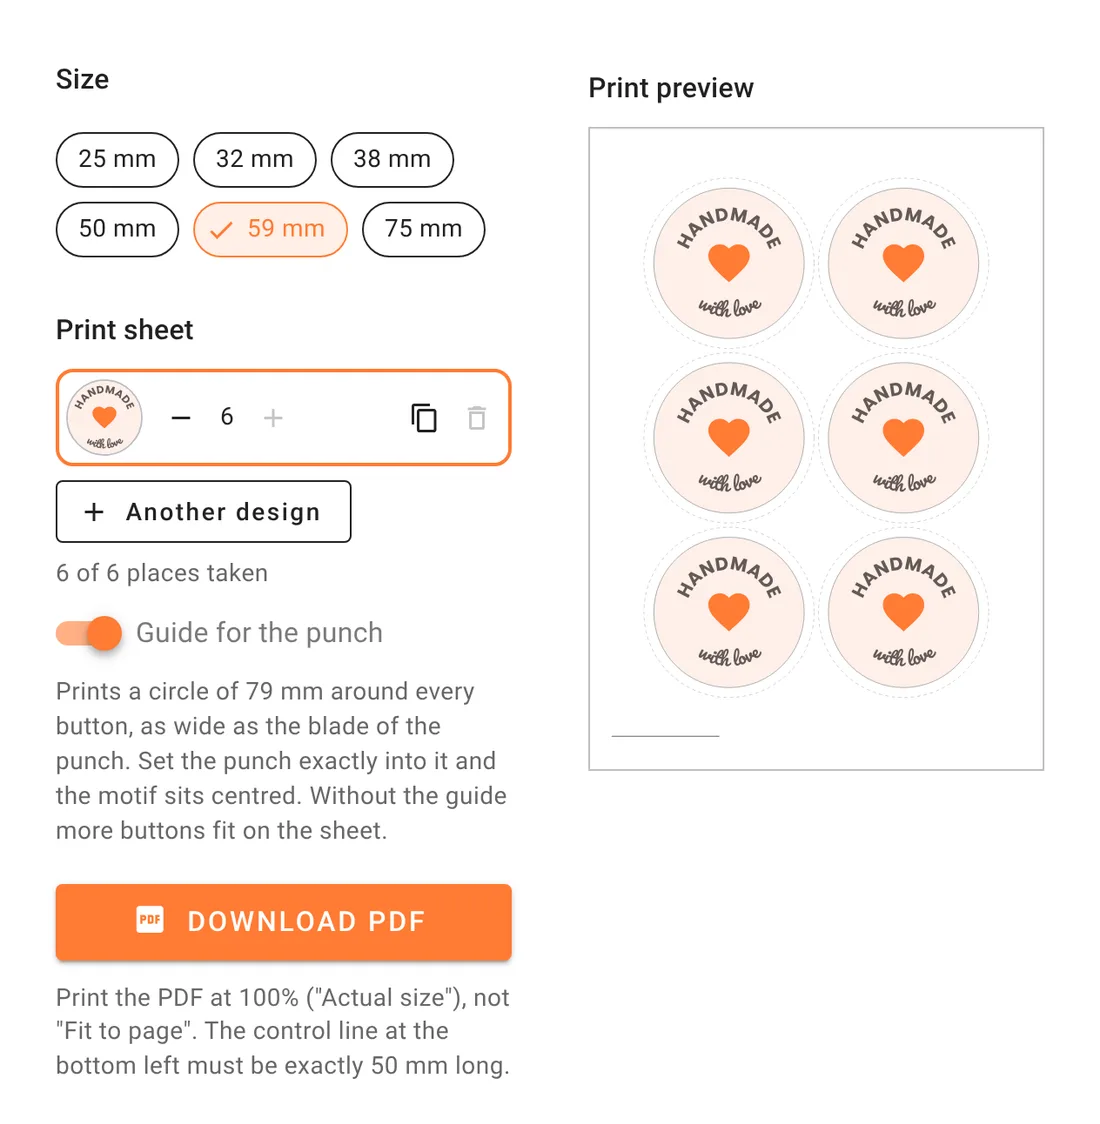
The guide for the punch prints a circle around every button that is as wide as the blade of the punch. Set the punch exactly into it and the design sits in the middle. Without the guide, more buttons fit on the sheet for some sizes.
To download the PDF, you sign up for emborado for free. Your draft is kept while you do.
Printing at actual size
The most common mistake happens in the print dialog. Many programs shrink a PDF automatically so that it fits the printable area. Every button then comes out a few percent too small.
- Print at 100% or “Actual size”, not “Fit to page”.
- After printing, measure the control line at the bottom left of the sheet. It must be exactly 50 mm long.
- Print a single test page before you print a whole stack.
- Let the ink dry briefly before you punch and press.
Punching and pressing
Punch out the designs. With the guide, set the punch into the printed circle. Without it, go by the cut edge. Scissors work too, but they take longer and the result is rarely as round.
On most machines the shell goes in first, together with paper and film, followed by the back. The exact order is in your machine’s manual. Make sure the design lies straight and the back is aligned so that the pin will sit horizontally.
Common mistakes and how to avoid them
- Design off-centre: usually the punch was set at an angle. The guide for the punch helps.
- Lettering cut off at the rim: the text was outside the motif area. Make it smaller or move it towards the centre.
- White edge on the button: the background did not reach the cut edge.
- Button printed too small: the print dialog scaled the page. Measure the control line.
- Paper wrinkles or the button will not close: the paper is too thick, or the cut does not match the machine.
- Image looks blurry: the resolution is too low for this size. Use a larger image or a smaller button size.
Frequently asked questions
Do I need an account? Not to design. You download the print sheet after signing up for emborado for free.
Are my images stored? Your draft stays in your browser. We store neither your images nor your design on our server.
Does the print sheet fit my button machine? Choose the size of your blanks and compare the cut edge in the table below the button maker with the paper cut of your machine. A test print on ordinary paper quickly shows whether everything fits.
Can I print several designs on one sheet? Yes. Add more designs and set the number of copies for each.
Where emborado comes in
emborado is a platform for creative files. You can manage embroidery designs, digital sewing patterns and cutting files there, with preview images, search and filters. We built the button maker because many people in our community do not only embroider and sew, but also cut, print and craft. With the account you create for the download, you can try emborado for free.
If you like working with textiles as well, our guide to fusing patches and iron-on transfers is a good next read.