Sew a reversible basket — an easy tutorial
Want a handy little basket you can use from both sides? This step-by-step guide shows how to sew a reversible basket in no time — perfect for beginners and highly customisable!
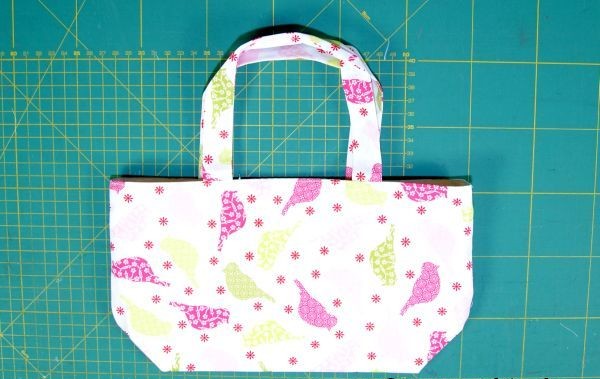
Do you want a practical little basket that’s usable from both sides? With this step-by-step tutorial you’ll sew a reversible basket (also called a “reversible tote” or “reversible pouch”) in no time. It’s perfect for beginners — and easy to embroider or decorate!
1. Prepare materials
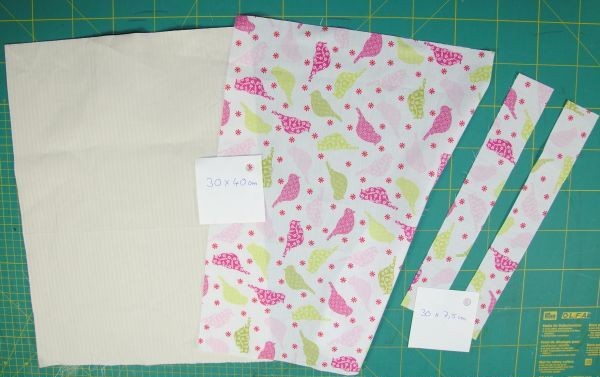
- Fabric A: 30 cm × 40 cm
- Fabric B: 30 cm × 40 cm (the second, “inner” side)
- Handles:
- either 2 fabric strips, each 7.5 cm × 30 cm
- or 60 cm of webbing (cut 30 cm per handle)
- Sewing thread
- Sewing machine, scissors, tape measure, pins/clips
- Iron
Tip: You can swap full handles for short loops if you prefer the basket as a storage bin without a carrying function.
2. Cutting & handle prep
Cut the fabric pieces
- Cut 30 cm × 40 cm from both Fabric A and Fabric B.
Sewing fabric handles (if not using webbing)
- Press the strips flat.
- Set them aside until it’s time to attach them.
3. Cut the corners
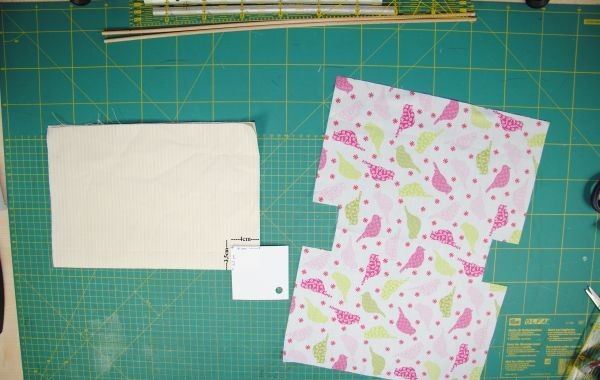
- Fold each fabric piece in half.
- At the fold, cut out a rectangle 3.5 cm × 4 cm.
- Unfold — the corner cut-outs should look like in the photo.
4. Attach the handles
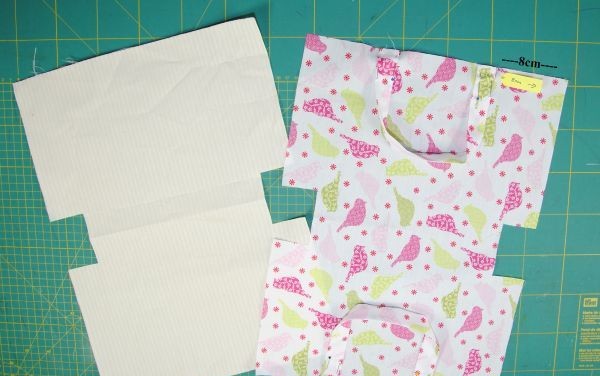
- Pin the handles:
- Position each handle along the top edge, 8 cm in from the outer edge.
- Make sure the handles aren’t twisted.
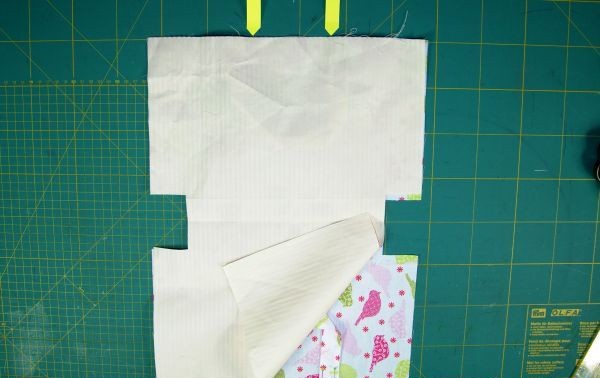
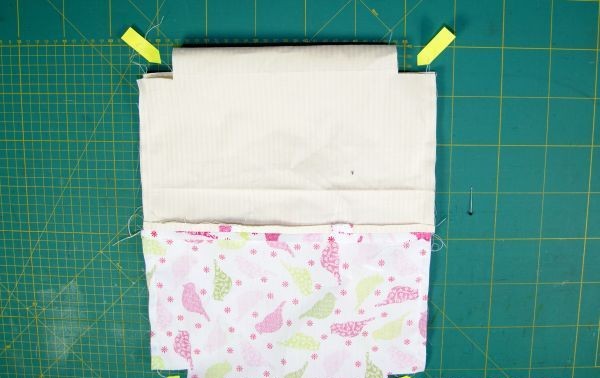
- Sew pieces together:
- Place fabrics right sides together and stitch across the short top and bottom edges.
- Remember to leave a turning opening on one of the top edges between the handles.
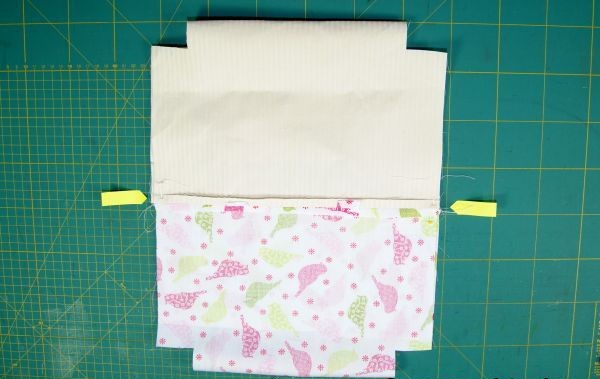
5. Sew the side seams
- Press seam allowances open:
- Open up the fabric and press the seam allowances.
- Now the same fabrics lie right sides together.
- Sew the sides:
- Stitch both side seams — leave the corner cut-outs open.
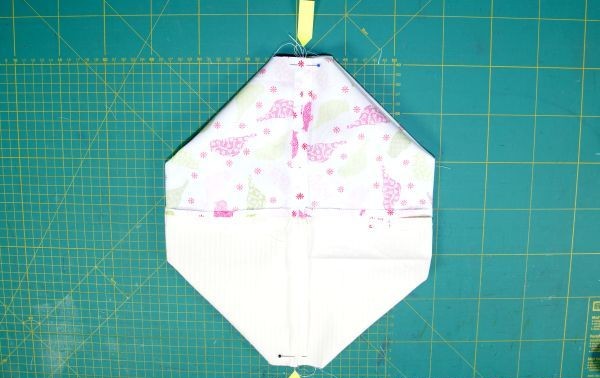
6. Box the bottom corners
- Open the corners:
- Pull the open corner so the cut edges align in a straight line.
- Stitch across that line.
- Repeat for all four corners.
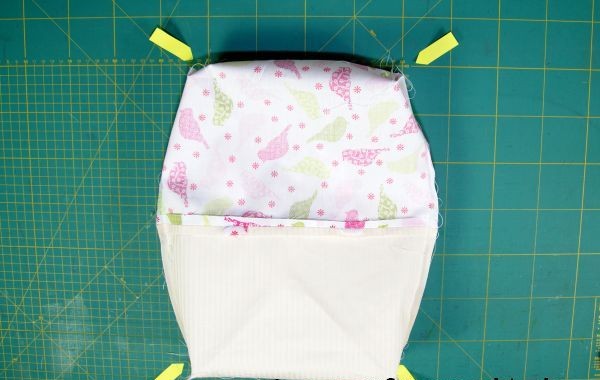
7. Join at the corners
- Align the seam allowances at the corners and stitch them together.
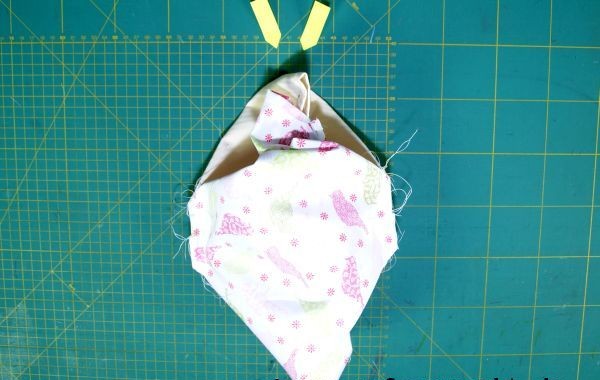
8. Turn and finish
- Turn the basket right side out through the turning opening.
- Give the basket a good press.
- Close the turning opening by hand or with a narrow topstitch.
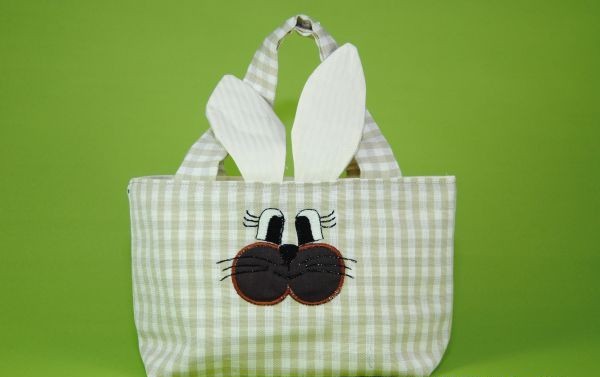
- Decorate as you like: embroidery, fabric paint, buttons or crochet flowers.
Conclusion
With this simple tutorial you can sew a practical reversible basket in no time — perfect as an Easter basket, organiser, tote or small gift. Thanks to the turning opening there’s no visible seam, so both sides look neat.
Have fun sewing and experimenting!